Background Removal
If your product images don't have a transparent background, you can use the background removal feature to remove the background from your images. It uses AI to detect the background and remove it.
When the background is removed, you can use the images in the Template editor for your Dynamic Product Ads.
Since the background is removed by an AI, it sometimes make mistakes. Therefor there is an approval process to make sure that the background is removed correctly. You can approve or reject the background removal. If you reject it, you can manually remove the background.
Approval Strategy
By default, all images are automatically approved. This means that you don't need to go through all the images and approve them. However, you can still reject the background removal if it is not correct.

You can also choose to manually approve the images. This means that you need to go through all the images and approve or reject them.
How to use

When you have selected a shop, you will find the background removal feature in the sidebar. Click on the "Background Removal" button to open the background removal page.
Steps
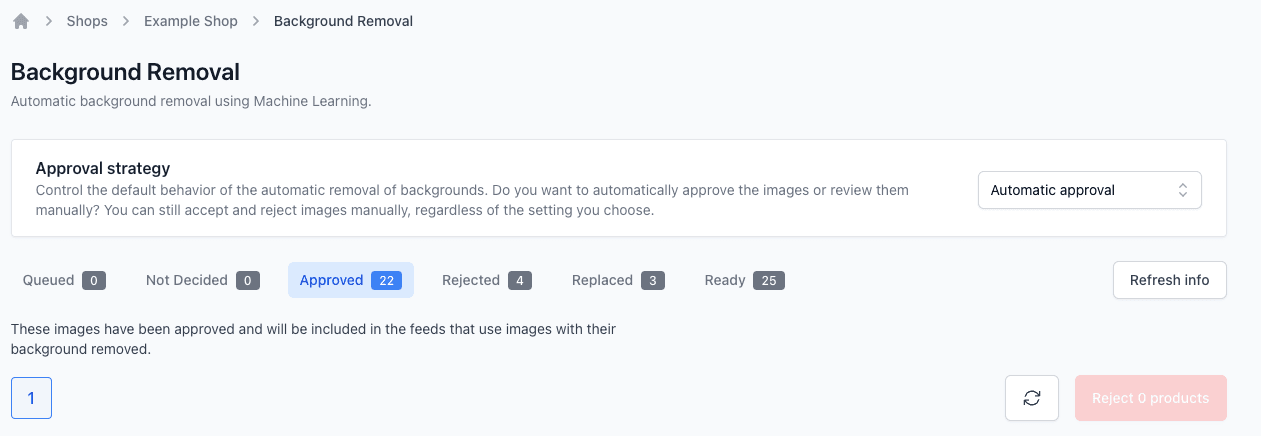
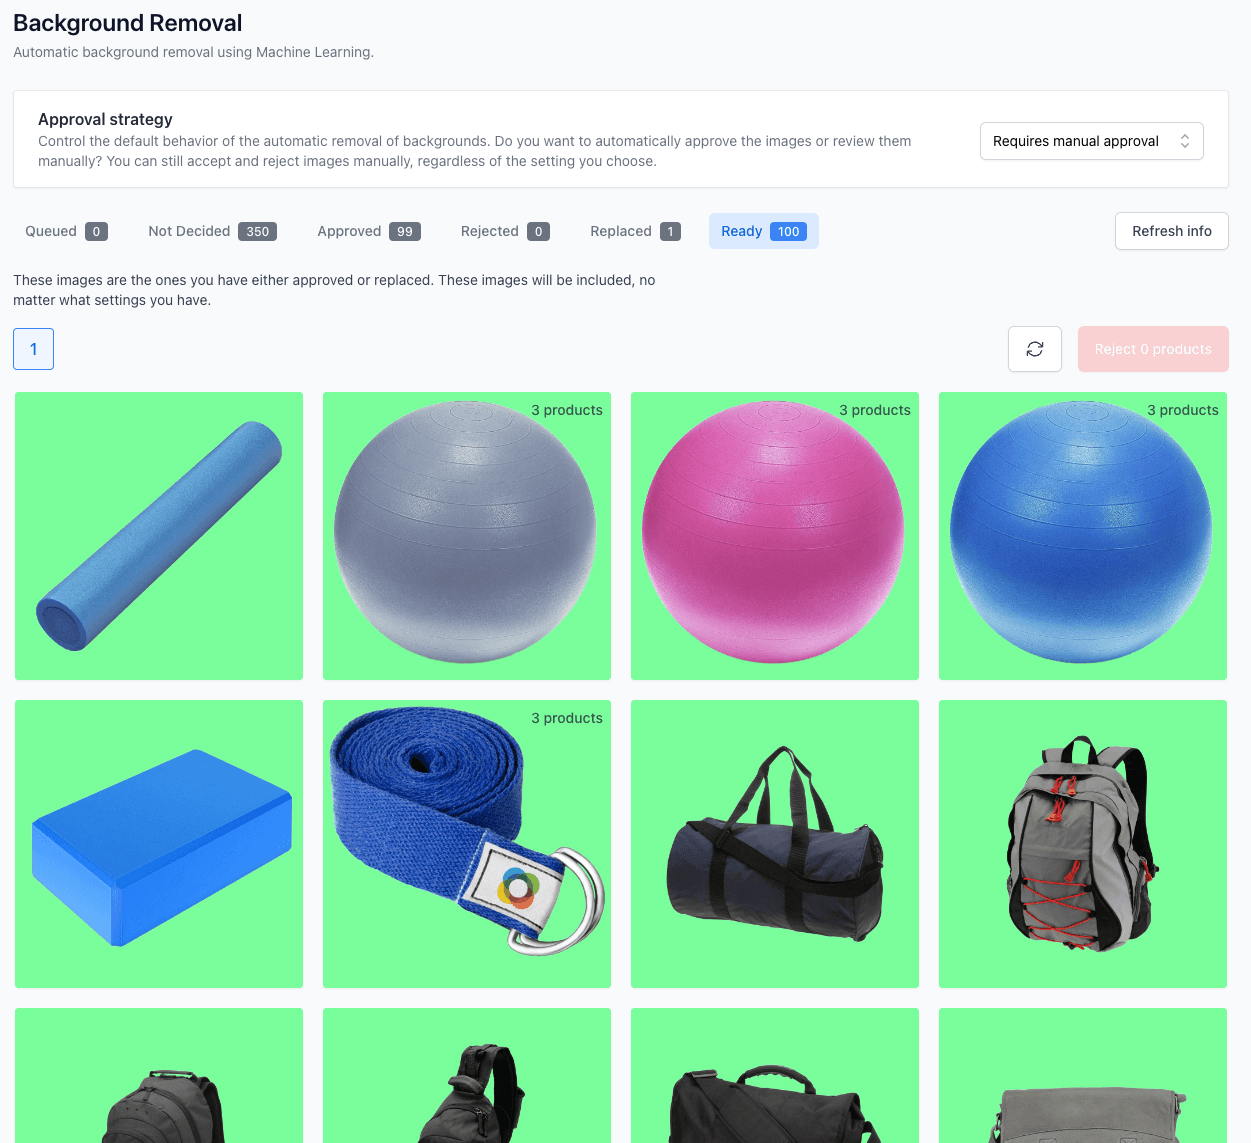
When you enter the background removal page, you will see an overview of the background removal feature. The overview is diveded into different sections:
- Queued - The images that are queued for background removal. This means that the images are waiting to be processed.
- Not Decided - The images that are not decided yet. This means that the images are processed. This is the images that you need to approve or reject.
- Approved - The images that are approved. This means that the background removal is correct.
- Rejected - The images that are rejected. This means that the background removal is not correct.
- Replaced - The images that have been replaced. This is the case when you decide to use either the original image, your own uploaded image or a manual removal using the Repair Tool.
- Ready - The images that are ready to be used. This means that the background removal is correct and approved.
Not Decided Images
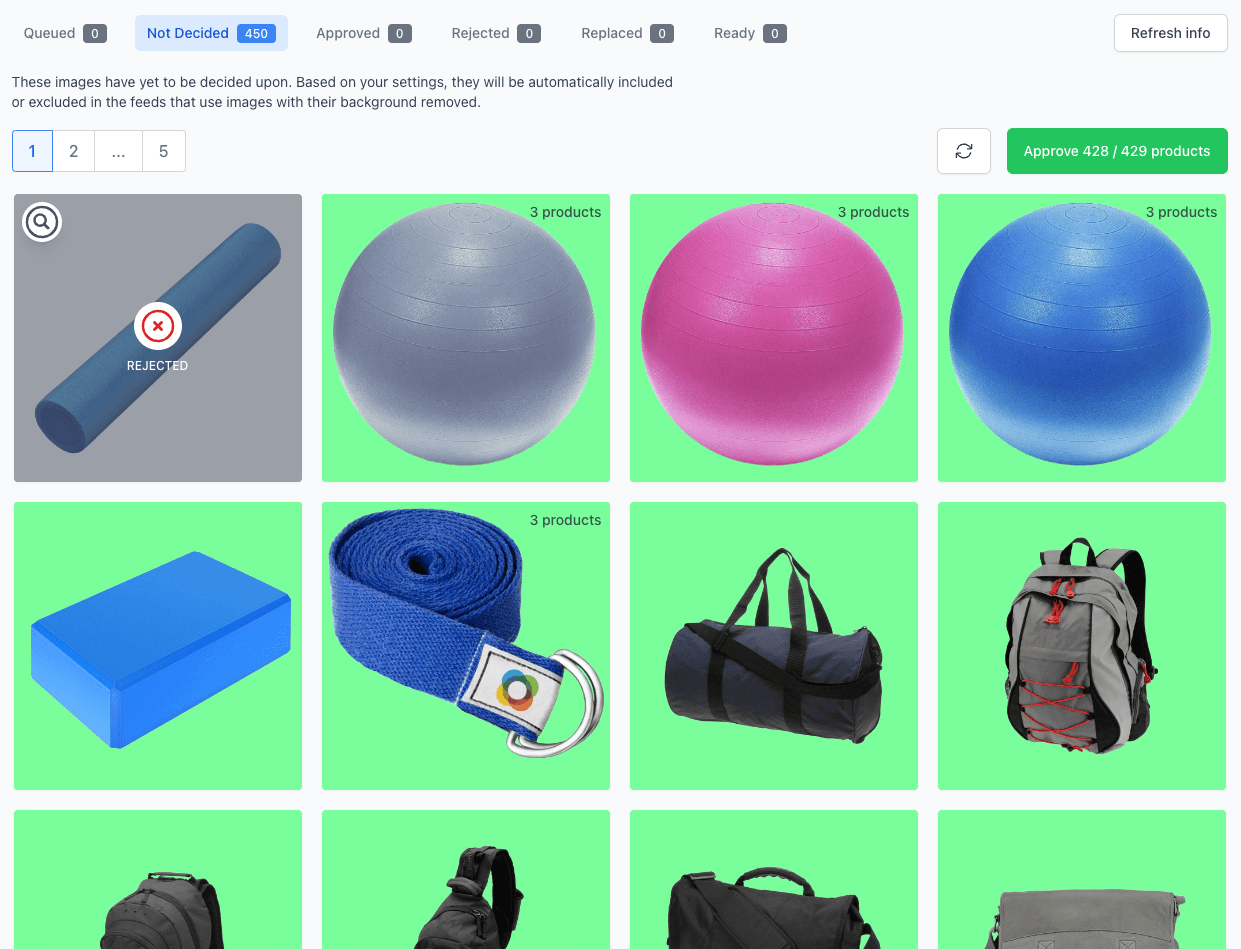
When you click on the "Not Decided" section, you will see all the images that are not decided yet. This is the images that you need to approve or reject. To reject an image simply click on it and you can see that it is marked as rejected. When you have rejected all the images that you want to reject, you can click on the "Approve" button to approve the rest of the images.
Hover an image to see the original image or click on the magnifying glass to see the images side by side.
Approved Images
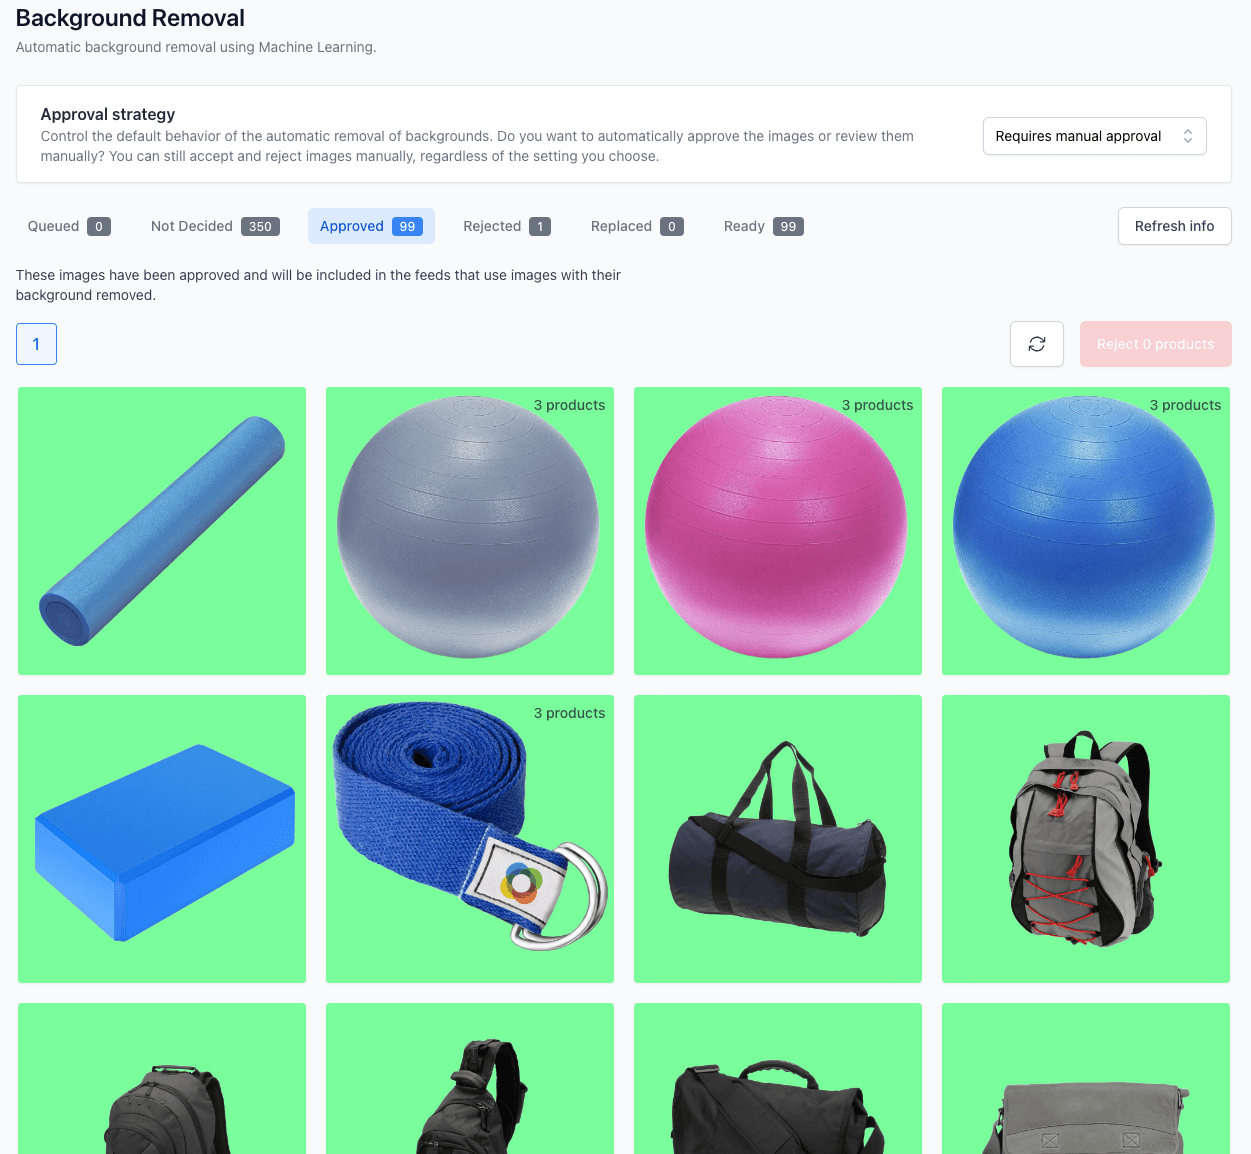
When you click on the "Approved" section, you will see all the images that are approved. If you've made a mistake and want to reject an image, simply click on it and you can see that it is marked as rejected. To save the changes, click on the "Reject" button.
Rejected Images
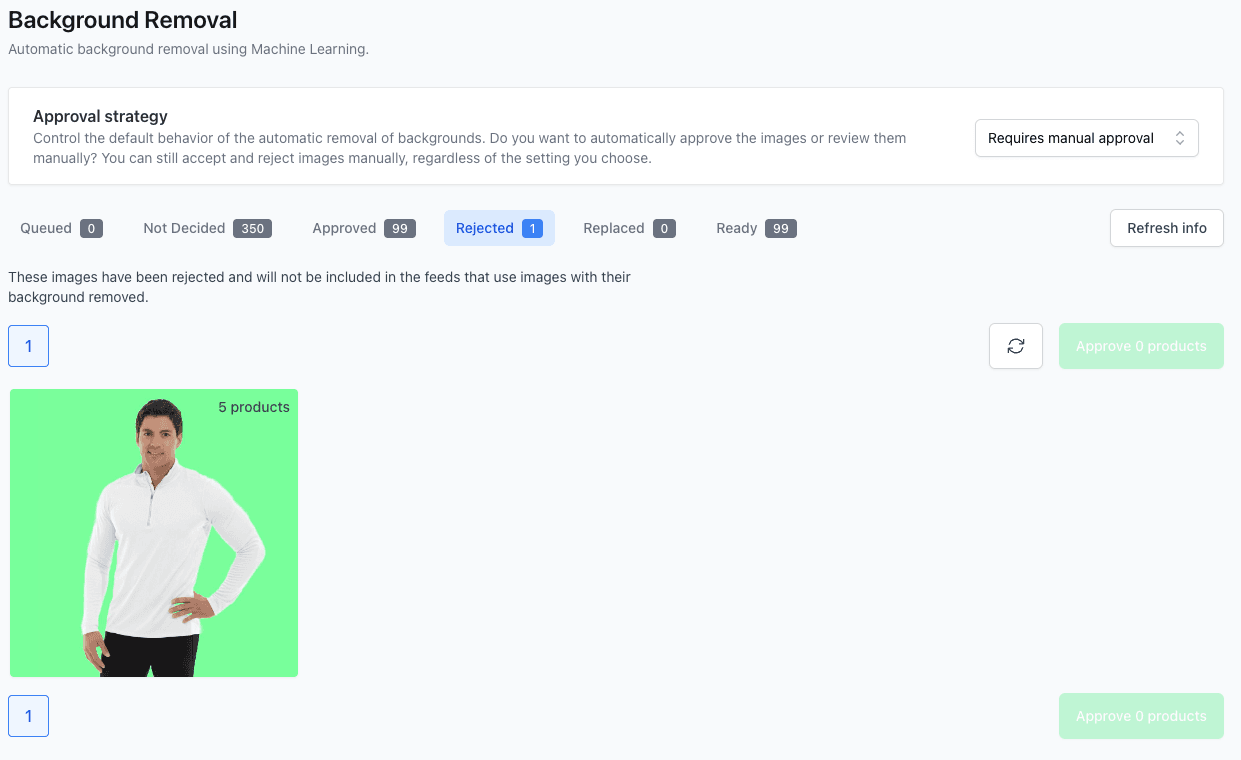
When you click on the "Rejected" section, you will see all the images that are rejected. If you've made a mistake and want to approve an image, simply click on it and you can see that it is marked as approved. To save the changes, click on the "Approve" button.
If you click on the magnifying glass, you can see the original image and the background removal image side by side. Here you have the option to use the original image, upload your own image or use the Repair Tool to manually remove the background.
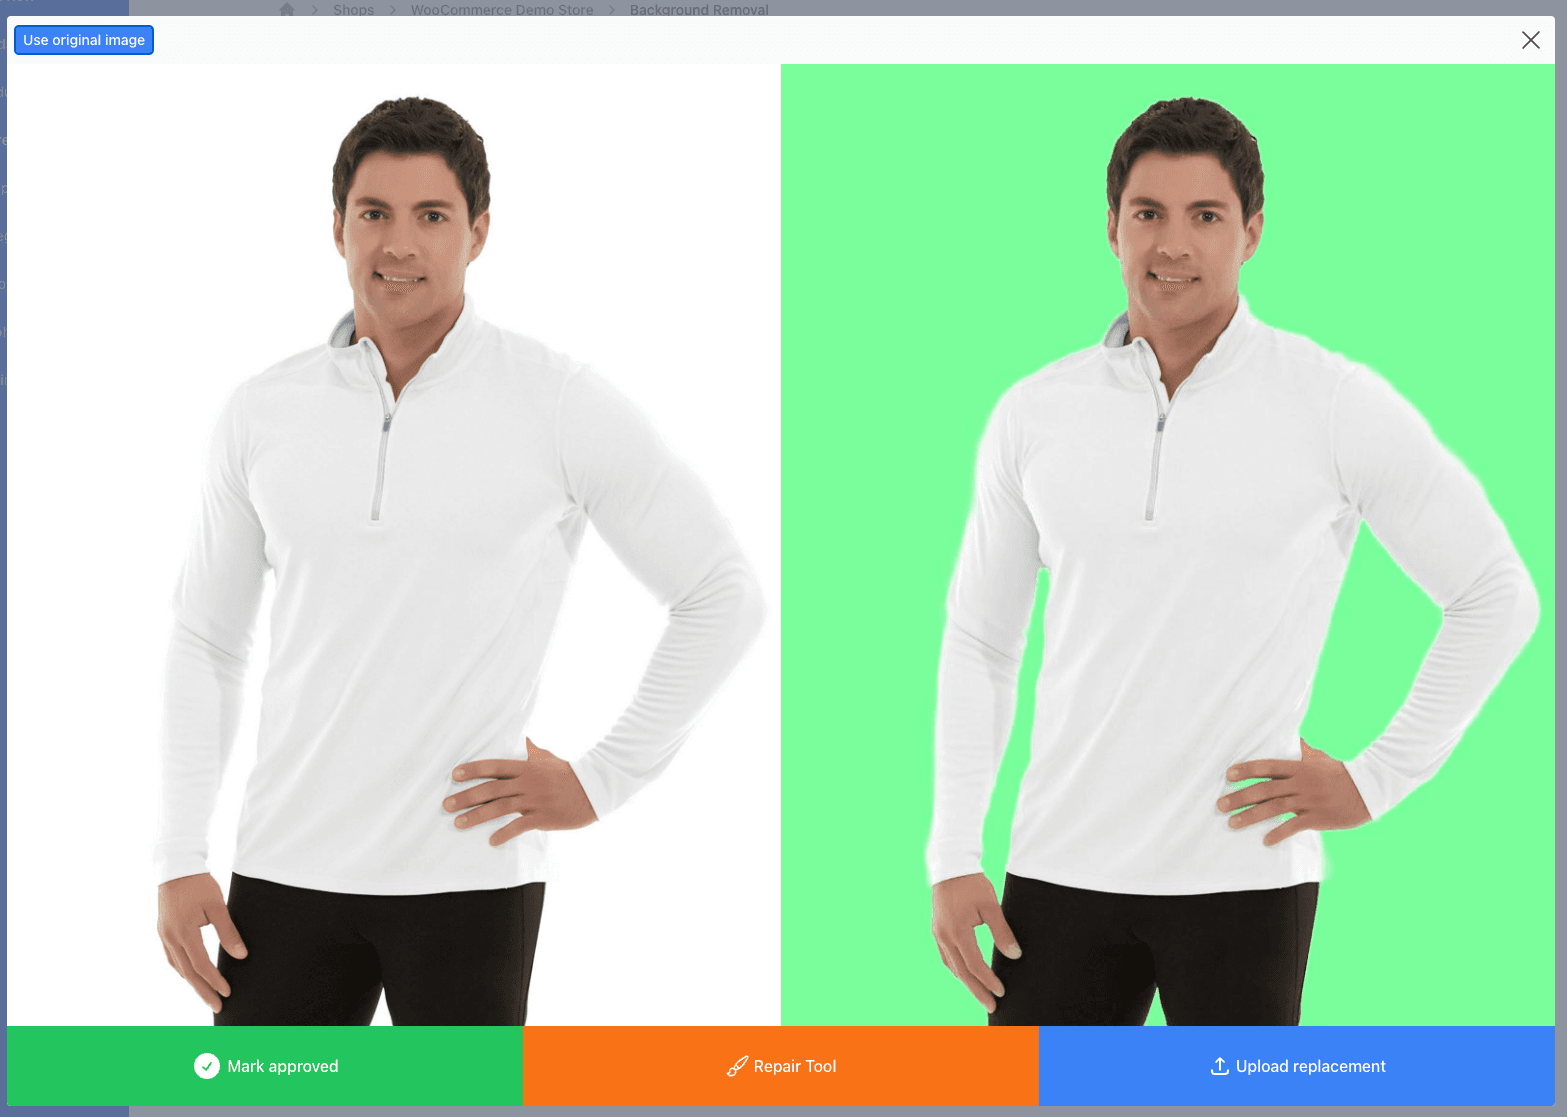
In this case, there is an error in the background removal (by the fingers). To fix this, you can use the Repair Tool to manually remove the background.
Repair Tool
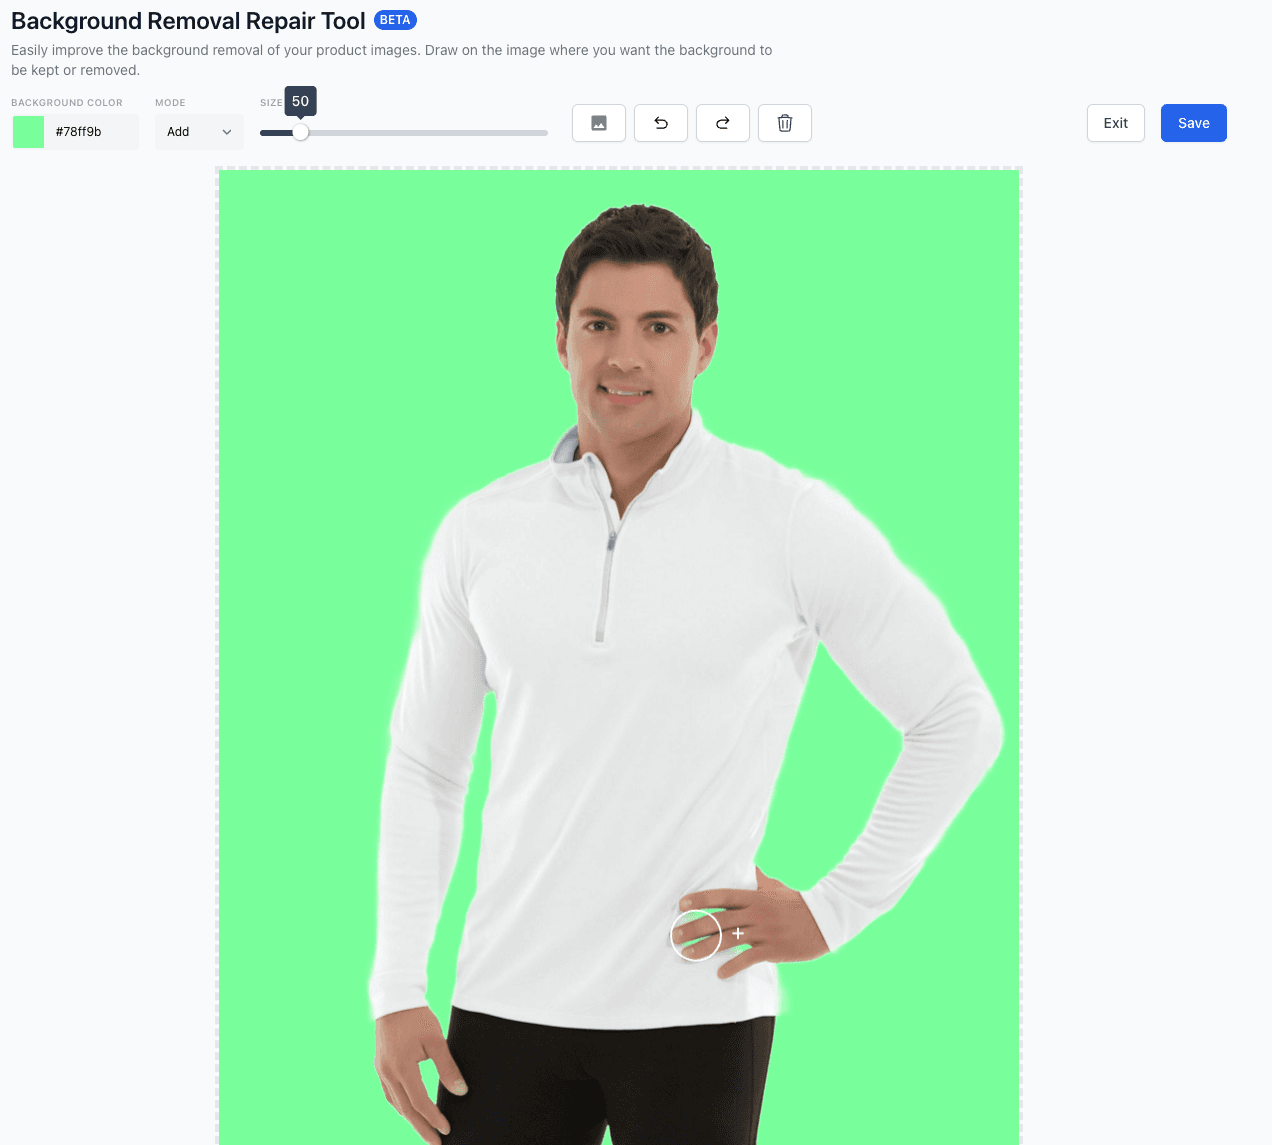
With the Repair Tool you can manually remove the background. It works by either taking away the background or adding it back.
You can change the size of the brush, the color of the temporary background.
It's also possible to overlay the original image to see where the background is.
When you are done, click on the "Save" button to save the changes.
Replaced Images

When you click on the "Replaced" section, you will see all the images that have been replaced. This is the case when you decide to use either the original image, your own uploaded image or a manual removal using the Repair Tool.
In the example you can see the image that we fixed using the Repair Tool.
If you want to remove your replacement, click on the magnifying glass and then click on the "Remove replacement" button.
Ready Images
In the final section you will see all the images that are ready to be used. This is either the images that are approved or the images that you have replaced.